March 15, 2014 -
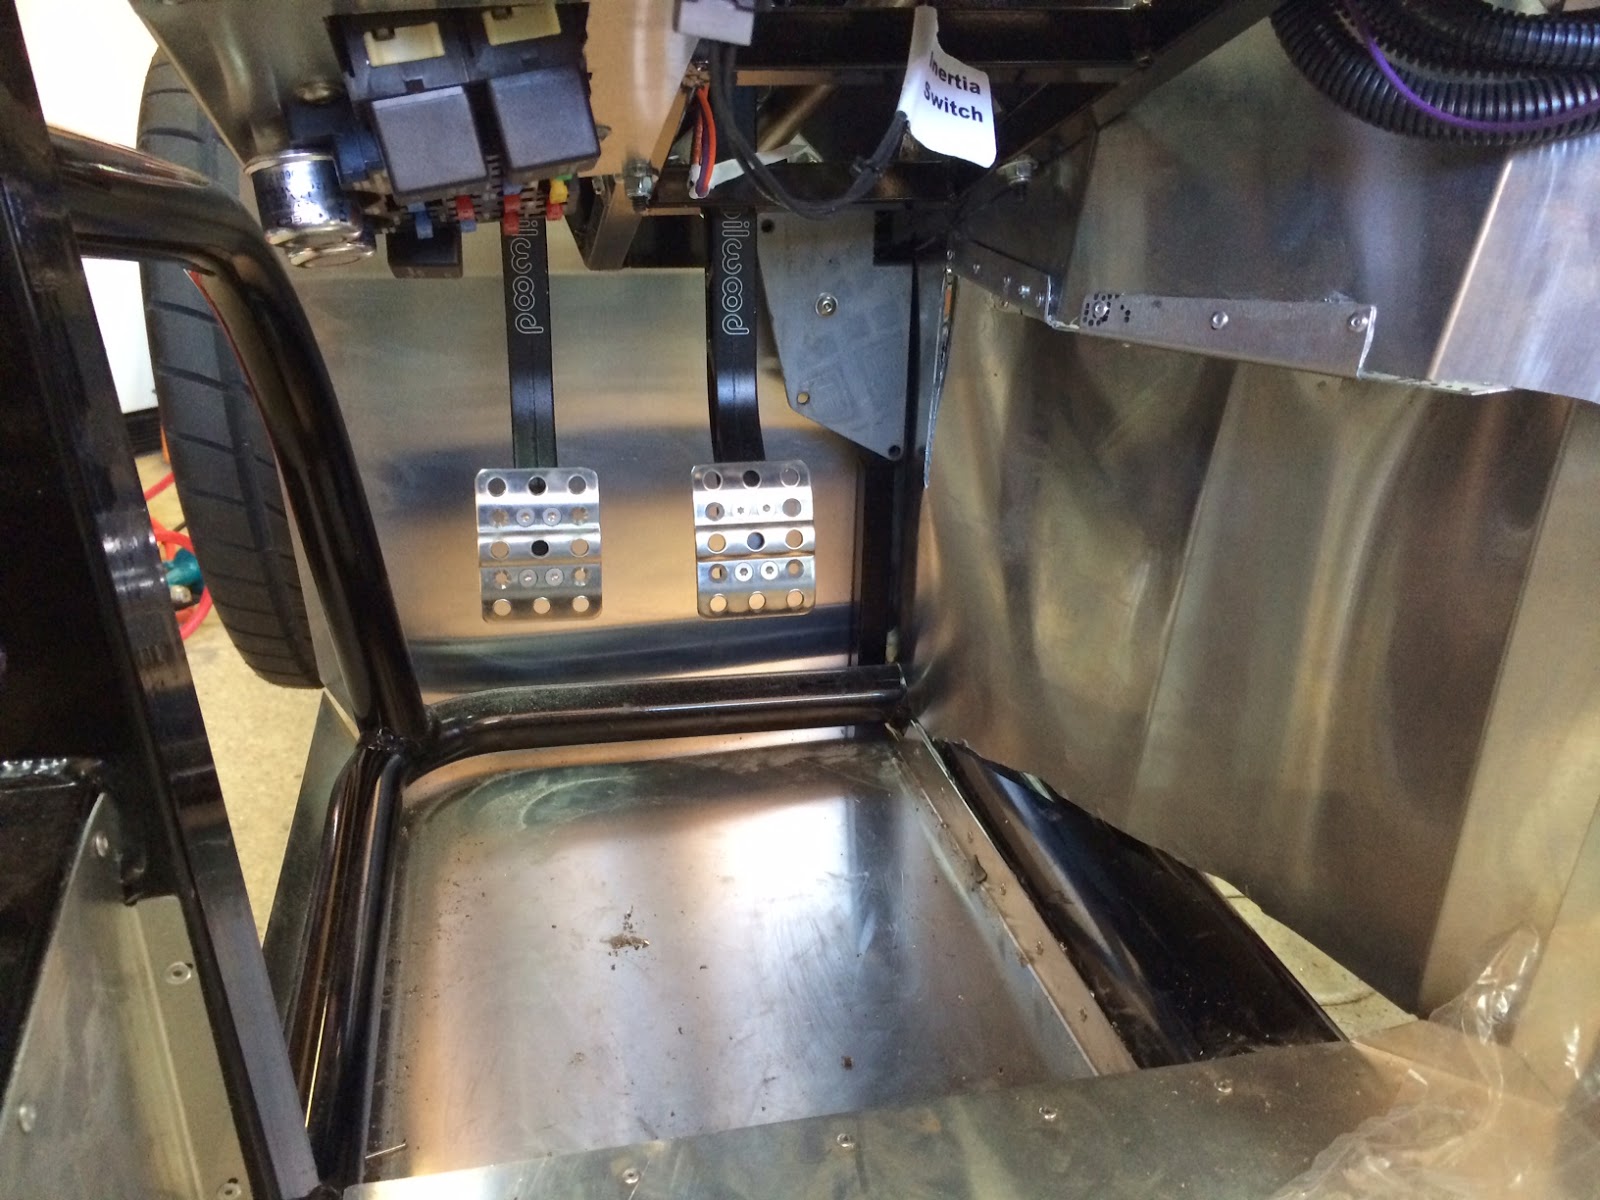
Today my Dad came over and helped me finish putting on the top edge of my driver's footbox inner panel bump out. I don't think I could've done this by myself as one person (me) had to push *really* hard on the aluminum panels to get them close while the other drilled and riveted them. So I big thanks to Dad! Take a look at the engine bay side :
And here is the view from the inside:
Sunday, March 16, 2014
Tuesday, March 11, 2014
Accelerator Pedal
March 10, 2014 -
Today I did more aluminum cutting. Once the battery died from that I thought another thing I could get started on was the accelerator pedal. For the Coyote setup, you have to cut up the pedal that comes with the Coyote and merge the Factory Five pedal to it. I did the cutting up of the Coyote pedal and mounted it but you won't see a spot for your foot because I haven't put the Factory Five pedal onto it yet. You might also notice some of the aluminum cutting in the photo below.
Monday, March 10, 2014
Return Fuel Line
March 9, 2014 -
I titled this entry "Return Fuel Line" but really the last two weeks have been spent cutting aluminum with a Dremel which is really slow. I am trying to move the driver's side foot box inner panel to both make more room for the accelerator pedal and more room for the engine. I've done about 70% of the cutting so far. The Dremel battery only lasts about 10-15 minutes, so once it was empty on the last try I decided to get something else done. I put the return fuel line connector on the fuel pump, hooked up the flexible line, bent the hard line and riveted the hard line in place. You can see the end of the flexible line and the hard line running horizontal along the top in the photo below. (I don't think cutting aluminum offers many good pictures, hence the lack of posting.)
Monday, February 24, 2014
Headers
February 23, 2014 -
It's been a little while.... I was on vacation in the Dominican Republic for a week and it has otherwise been pretty cold around here. I'll throw in what's sure to become a 2014 dated phrase "polar vortex" to describe the temperatures.
I also became a little frustrated after putting the engine in to find that it was touching the driver's footbox. I'm sure this would cause a lot of rattling with movement of the engine so this had to be fixed and the fix was going to require the engine coming back out. I felt a little better after reading some build blogs/forums that said it would be highly unusual if you didn't have to take the engine in and out a few times on a build.
To get an idea of clearances I wanted to put on the headers to see how much room was between them and the lower part of the footbox inner wall. (Because if I'm moving the upper part of the footbox in to give the engine more room, why not see if the lower part can be pushed out towards the engine to give more foot room in the cockpit?) Of course the driver's side header is nearly impossible to put on with the engine in. (I think I read that you need to take the bolts out of the engine block, put the header in, then put the bolts back in and all that is *really* tight to get a socket/wrench in there.) So I undid the transmission mount bolts, the engine mount bolts, reassembled the engine lift, and lifted the engine about 6 inches to get the headers on. (The headers, by the way, are the shiny 4-in-to-1 pipes.) Here is the driver's side:
Here is the passenger's side (much easier):
I will hopefully have a friend over to help me lower this back down. (Operating the engine lift either way is probably best done with more than 1 person.)
Lastly, I thought I would leave you with a picture from the vacation.
Wednesday, January 15, 2014
Starter
January 15, 2014 -
Everything I do now seems so small and minor compared to putting the engine and transmission into the car. Today I first tried putting in the drive shaft. Unfortunately I am pretty sure the one I was sent is too short. I heard that it should go about 4 inches into the transmission and this one maybe gets on 1 inch but then slips off when the other end is bolted down to the center section. I will be calling about that tomorrow. So then I went back to the starter. (I had begun the other day with the starter but the bolts supplied looked too short and would barely catch into the bell housing where it mounts.) Sure enough, after calling the supplier, the company that makes the starter has increased the thickness of the bracket on the starter. I ran to the hardware store and as the man was locking the door because they close at 6:00 he let me buy 3 longer bolts. I was determined to get something done today! The shiny brass colored cylinders in the picture below are the big parts of the starter.
There were some other side successes lately like getting another sheet of hush mat on the driver's side footbox *after* the engine installation which made it *very* tight. I also replaced the rear liftgate struts, some interior body panel clips, and a side marker light on my SUV daily driver but that's not what this blog is about.
Sunday, January 12, 2014
Transmission and Engine
January 10-12, 2014 -
I got the clutch fork and its bearing during the week so Friday I put it all together and tried putting the transmission on by myself. I got pretty close but not all the way and was really tiring myself out. With Saturday being a rainy day I had the good fortune to have my friend Dave come over and help out for a couple hours. After both of us trying to put the transmission on the engine (but this time with the bell housing attached to the transmission and not attached to the engine) we took a break and realized that the clutch just is centered enough. (Some experts on youtube are seemingly able to eyeball it but we just weren't that good.) We looked around for a clutch alignment tool until Dave (though he gives Whiskey credit for this idea) said we should use the transmission as the alignment tool by putting it in without the bell housing and clutch fork and the pressure plate nice and loose. Then with the transmission in and everything aligned, tighten the pressure plate, pull the transmission out, put the bell housing and clutch fork and clutch fork bearing on, and then reinstall the transmission. That worked! (Watch out for the clutch fork slipping off the pivot bolt head when you are handling the bell housing.) Here it is:
Then Dave and I started hoisting this into the car! We ended up having to use some rope to pull the transmission down to get a steeper angle, and moved the car (with the front wheels on wheel dollies) forward to get it into position as that was easier than rolling the lift around.
Maybe three people should have been involved in that job but we did all right. I did find the bolt that had to be removed that interfered somewhat with the steering shaft. I ran out of time and had to pick the job up Sunday with help from my Dad. With my Dad on Sunday we tightened down the transmission mount point, and tightened the engine bracket bolts to the frame. Here it is in the car:
Dad helped me breakdown the engine lift and store it away. Now I have a lot more room in my garage and this is really looking like a car! Much thanks to Dave and my Dad!
Monday, January 6, 2014
Water Temperature Gauge Sender & Oil Level Sensor
January 5, 2014 -
Now that my 14mm hex bit arrived from Amazon I was able to remove the plug in the engine block and install the water temperature gauge sender. (Yes, 14mm is huge. Your typical hex wrench set goes up to 8mm and that usually looks big.)
After that I tried soldering the connector on the oil level sensor back to the wires that had snapped off when I dropped the oil pan. I think it went ok, but it is hard to tell inside the connector if I might've shorted out the connections. If I have I think an engine light will come on and tell me so.
Subscribe to:
Posts (Atom)
