Monday, October 27, 2014

Footbox Panels

October 26, 2014 -

  I riveted on a small patch panel on the driver's side of the transmission tunnel:


  Then I riveted on the outside wall of the driver's side footbox and another patch panel on the front of the footbox.  That panel on the front needed a little filing to get a good fit,


  I also put together a bunch of the gauge light wires and their grounds together with wire nuts.


Monday, October 20, 2014

Dash Related Stuff

October 20, 2014 -

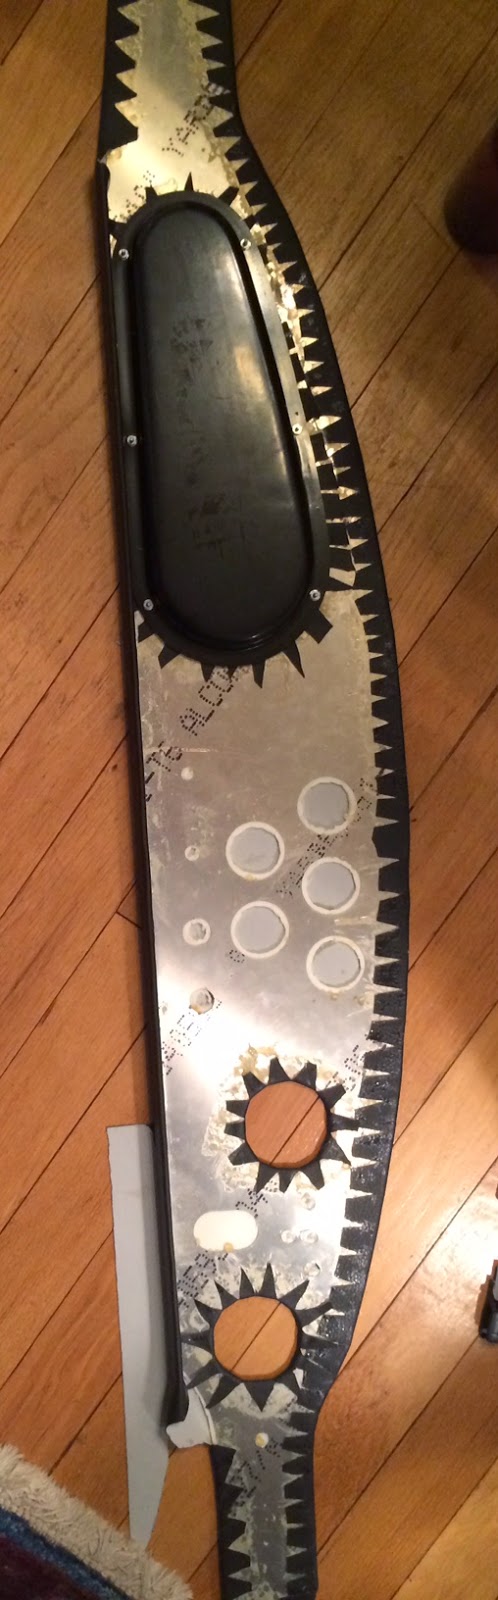
  I put silicone and riveted the dash extension piece on and then cut the dash extension oval cover plate to size with the wire bundles.  I then siliconed and riveted the cover plate on which you can see here:


  I also put the wiper switch in the dash next to the horn button seen here:


  I did have a big update a week and a half ago which I posted on the ffcars forums but not here.  It turns out that Wilwood has updated the design of the rear brake bracket to give the 1/4" of wheel clearance that I've been saying all along they need.  (They had an old design that did this but changed it and it made the caliper touch the inside of the wheel.)  Unfortunately the production time is 4 weeks until these newly designed brackets can be sent out to me.  I'm happy that I don't have to "custom cut" my own bracket though.

Monday, October 6, 2014

Coolant

October 4, 2014 -

  I had a couple of problems getting the coolant system to work right.  First the radiator fan wouldn't come on.  It turns out you need to ground the green wire that goes into the relay in the chassis wiring harness.  It is the green wire with the yellow wire nut in this picture.


  So then the fan came on once the engine warmed up to 195 degrees.  The problem was then that the engine didn't stop warming up.  I had put as much coolant as I could in the fill cap.  I think running the engine pushed around some air in the system though.  Then I opened up the fill cap, was able to put more coolant in and for good measure opened up the driver's side petcock on the radiator and filled through a tube there until the fill cap started to over flow into the over flow tank.  This is what the radiator petcock looks like that I am referring to:


  Now the engine doesn't heat up past about 205 degrees which is a good operating temperature.

Friday, September 19, 2014

Dash Gauges

September 19, 2014 -

  I finished gluing up the back of the dash and put the gauges and indicator lights in today.  I also put in a turn signal switch all the way to the left.


Wednesday, September 10, 2014

Dash Work

September 10, 2014 -

  This is going slow in part because I've been traveling a lot and because you need to wait between each gluing.  Here is the back with the glove box on.


  Here is the front of the dash.  I think it looks pretty good with the glove box installed.  You can also see two of the larger gauge holes done for the speedometer and tachometer.


Monday, September 1, 2014

Dash & Footbox

September 1, 2014 -

  I've been working on the dash for over a week now.  Drilling the right size holes for different switches, ignition, lights, etc, then gluing the dash padding on, trimming that, then gluing the covering on, trimming, etc.
  Here's the dash padding on.


  Then, a few days later, here is the dash surface being glued on over the white padding.

  You can see how it needs to be cut so that it can fold over the edge and make it around the curves of the dash.  You can also see some books weighing down another side which is drying.  If you look towards the far edge, that is the bottom of the dash and has a 90 degree edge to it.  That was not easy getting the padding and covering to glue to a short surface that actually turns more than 90 degrees back so it was hard to put weights on it to hold it while it dried.  Thanks for the extra hand Michele, in getting that glued down evenly.
  While that was drying I went out to the garage and finished up trimming a spare piece of aluminum for the driver's footbox expansion I did earlier.  This piece has 4 separate 90 degree edge bends up which are in the engine bay side of the footbox.  (Those edges bent up are needed to rivet the existing footbox wall to.)

  If you look closely at the top of the photo you can see the bottom edge of the expansion from above.  This gives the right leg a lot of room and only starts to feel narrow if your foot is pressing *all* the way down on the accelerator. I don't think I should be doing that anyways. ;-)


Saturday, August 23, 2014

Battery Box Cover

August 23, 2014 -

  I finished cutting the hole for the glove box and put in the mounting screws for it.  But then I thought before I glue the padding and dash cover on maybe I should check if there are any more holes to drill.  Sure enough I think all of the signal light indicators need holes drilled and I think I'm missing one indicator light. I also think I need an ignition hole but I'm going to check with the forums and maybe Factory Five on that.
  I also started trimming an aluminum piece for the driver's side foot box floor to finish the kick out I did for more foot room around the accelerator.
  Lastly, I also put a proper grommet in the battery box hole where the switch cable comes in to the positive battery terminal.  Then I put the cover on the battery box. Sharp looking I think!