Monday, September 9, 2013

Battery Box and Wheels

September 8, 2013 -

  I topped off the fluid in the IRS center section (rear differential) and then installed the new battery box I got from FF Metal. I had to trim about 1/4 of an inch off the support bar but otherwise it fit in great! It was also nice having a second hand around to hold it to line up all those pre-drilled holes. (Thanks Rachel!)

  Next I thought I would check the ride height by putting the wheels on. The frame rail by the doors are 9 inches off the ground but the large frame tubes dip a little lower and I would imagine this all lowers some with the engine and transmission installed.  I also think the fiber glass body will wrap down below the frame a little getting still closer to the ground.  Wheels on made for nice pictures below but also let me check for flexible brake line rubbing / interference in turning the wheels which is something I'm going to have to think about.  I found that so far, turning the wheels on the ground without power steering is easy.


  For some perspective on how low and small this car is, I put myself in one shot. I'm no giant...


Thursday, September 5, 2013

Brakes

September 5, 2013 -

  It has been a while since I posted but a few things have been done. I got the front and rear flexible brake lines attached.  Pictured below is the rear:

 
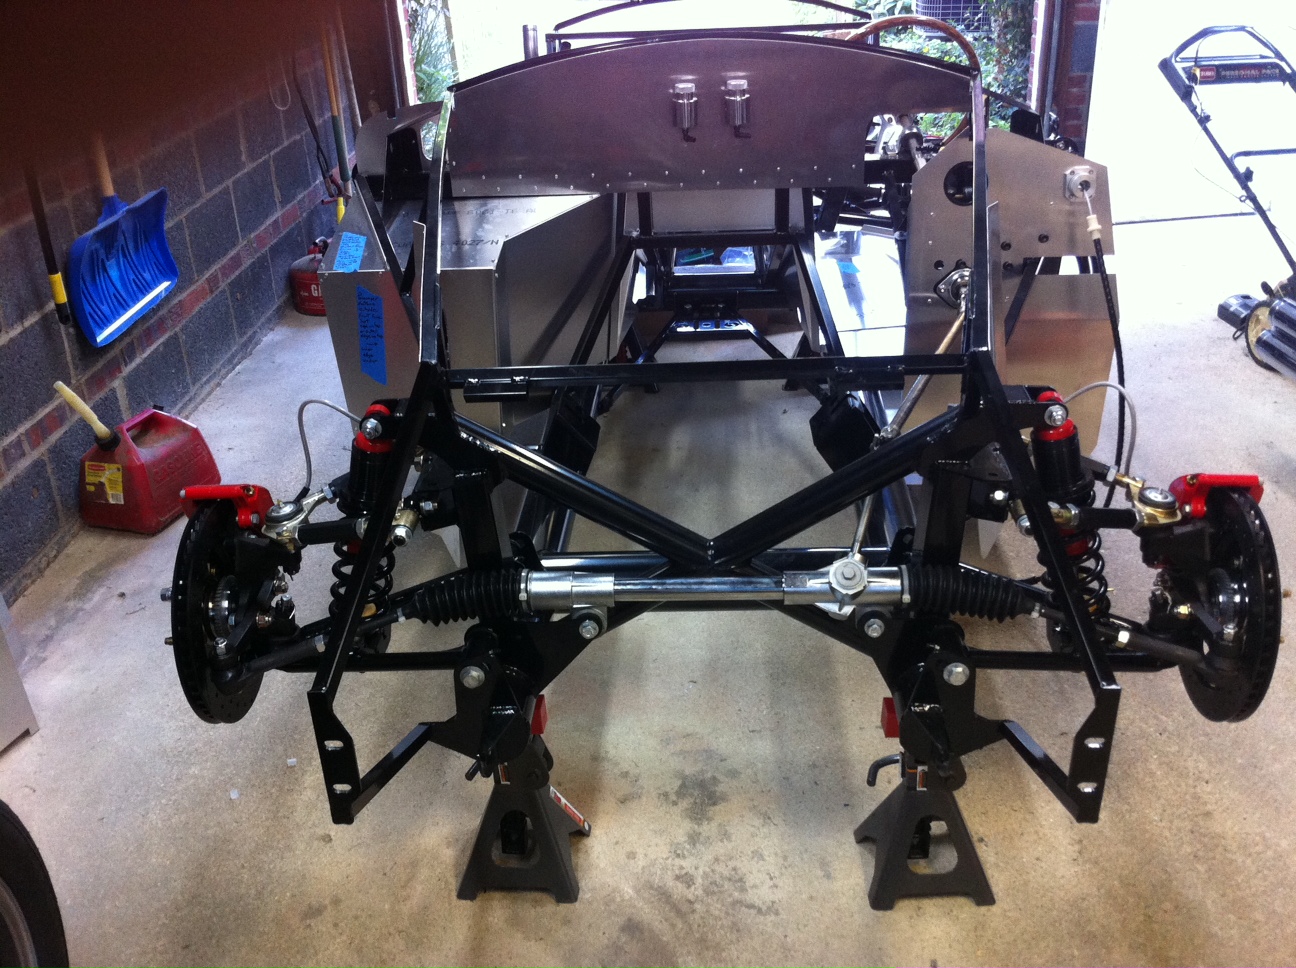
  Next up were the brake reservoirs.  I have two and would advise anyone doing this project to spend the extra money for the second.  Having two will keep the front and rear brake line systems completely separate so that if a line were to leak and brakes go out (front for example), you should have the other (rear) still functional.  I deviated from the manual on placing the reservoirs for a few reasons. The manual puts the one reservoir on the driver's front foot box panel.  That was a crowded area.  The second reservoir would have had to go too far outboard and would be left under the body, making a tough compromise between being low enough to get the cap off and high enough to make sure the fluid flowed down to the master cylinder. So here they are on the nice thick firewall I got from FF Metal.


  Lastly, I thought my front wheels (rotors) were toe'd outward too much. The only way to really fix that was to take off the steering tie rod and screw it in further.  This is a little time consuming but gave me the chance to access the grease nipple on the tie rod end to put grease in there which I didn't do before initially installing.  Tip for getting the tie rod off- loosen the bracket it attaches to from the spindle, then use both a hammer and a rubber mallet by hitting the bolt downward with the mallet and the bracket upward with the hammer simultaneously.  It sounds crazy but if you do them both at the same time you really don't have to hit either one that hard. In this picture you can also see I temporarily mounted the steering wheel to check that the front flexible brake lines didn't get in the way of steering or suspension when turning the wheels lock to lock.


Wednesday, August 21, 2013

Gas Tank

August 15, 2013 -

  I got the gas tank in place.  It was tough, in some part because the flanges around the tank's welded edge were bent up in places but I think needed to be flattened in order to fit.  This wasn't stated in the manual but after I asked someone at Factory Five they confirmed it.  The passenger side strap isn't all the way together tight but they say not to do that yet as it may need loosening or removing later to put some aluminum panels on.


Wednesday, August 14, 2013

Rear Brakes, Steering Rack, Pedal Box

August 14, 2013 -

  It's been a little while since I posted. Sorry, but things have been getting done. I got the rear brake rotors and calipers mounted.


  After that I got the steering rack and shaft in.

  Lastly, I put together the pedal box and installed it into the driver's foot box.  The brake pedal is in with two master cylinders connected (two metal cylinders on top with yellow caps on them.) You can also see the clutch cable coming over the clutch quadrant in the lower left part of the picture. The hardest part of the pedal box was using cheap snap ring pliers to get the snap rings off and on.  What I eventually realized was that the holes in the snap rings were just a little too small for the points I had on my snap ring plier attachments. (Yeah it's the kind with multiple attaching heads so you can imagine how good that grip is.) But since they were cheap I didn't care about taking a file to the points and filing them down to a smaller diameter which would fit in the holes in the snap rings.


Wednesday, August 7, 2013

Rear Spindle with Upper Control Arm

August 6, 2013 -

I got the upper control arm into the frame with its spacers around the heim joint and the other end onto the rear spindles. Soap helped slide things together (Thanks Damon!) Also, Joe at Factory Five suggested using the handle of a hammer to try and spread the frame mount tabs apart a little to get things to fit easier. While this helped a little with the lower control arms it helped a lot with the upper control arm since those mounts stick out from the frame further so you have more leverage on them. That tip probably would've helped with the front shocks where I had to file down the spacers to get them to fit.


Monday, August 5, 2013

Rear End

August 5, 2013 -

  As I was waiting for the IRS center section I thought I could skip ahead and assemble the e-brake (or parking brake) handle assembly. It was cool putting something together that I'd be touching as a driver. Pushing the spring pin (it looks like a small cylinder with a cut running up the side) into the ratchet mount plates and ratchet tooth took a little finagling but none of it was too hard.


  And then wouldn't you know it, at the very end of the day the UPS man came and dropped of my IRS center section and rear spindles. That IRS center section was heavy and really hard to push up from under the frame into where it needed to go. This was a great way to see how it needed to go in. (In the video his weighs 15 lbs because its empty. Mine came full of everything except gear oil and was probably 80 lbs.) To get it seated correctly I called Damon over and had a second set of hands. He stuck around to help put in the lower control arms, shocks, and CV axles. We tried to fit in the rear spindles but it was too tight a fit. I know now, to stop when things aren't going easy and you are tired. Go to the internet for answers and come back another day. Thanks for all the help Damon!


The bright stuff up front is just plastic covering the end of the CV axle keeping dirt and dust off a greasy end. The big aluminum thing towards the back is the IRS center section. 

Sunday, August 4, 2013

Driver Front Footbox

August 4, 2013 -

  I have been waiting for a while now on the independent rear suspension (IRS) center section to work on the rear axle, shocks, spindles, etc.  As that is still on back order, I skipped ahead in the manual to put on the driver's front footbox panel. The cool parts were more riveting with the pneumatic riveter and I got to use the new Cleco fasteners I got for my birthday. (Thanks Meredith!) The Clecos are the copper colored things sticking out below the big hole in the panel. (There are two of them used in this picture.)