Thursday, January 15, 2015

Transmission Plug

January 15, 2015 -

  There is a rubber plug in the driver's side of the Tremec TKO transmission that plugs a whole which is meant for the mechanical speedometer pickup/sensor.  The rubber plug is for shipping and should be removed for driving the car.  If you are using the electrical one on the passenger side then this rubber plug should be replaced with a steel one.  I bought a steel plug from Mike Forte.  In the following photo the rubber plug is the black round thing with the vertical tab running across it.  Note that the black bolt immediately to the right is something I had to buy to hold in the new steel plug and I just had it placed there for safe keeping.  the bolt is a 1/4 x 20 x 0.75 long bolt.  (I opted for the harder steel one which is better for auto uses.)


  Below you can see the metal plug taking its place which has a tab on the right with a hole that lets the bolt tighten it down.


  Something else I thought I would play with is seeing if I could move the passenger exhaust tube that connects to the header so that it would line up better with the body cutout.  Here is is when I put the body on:
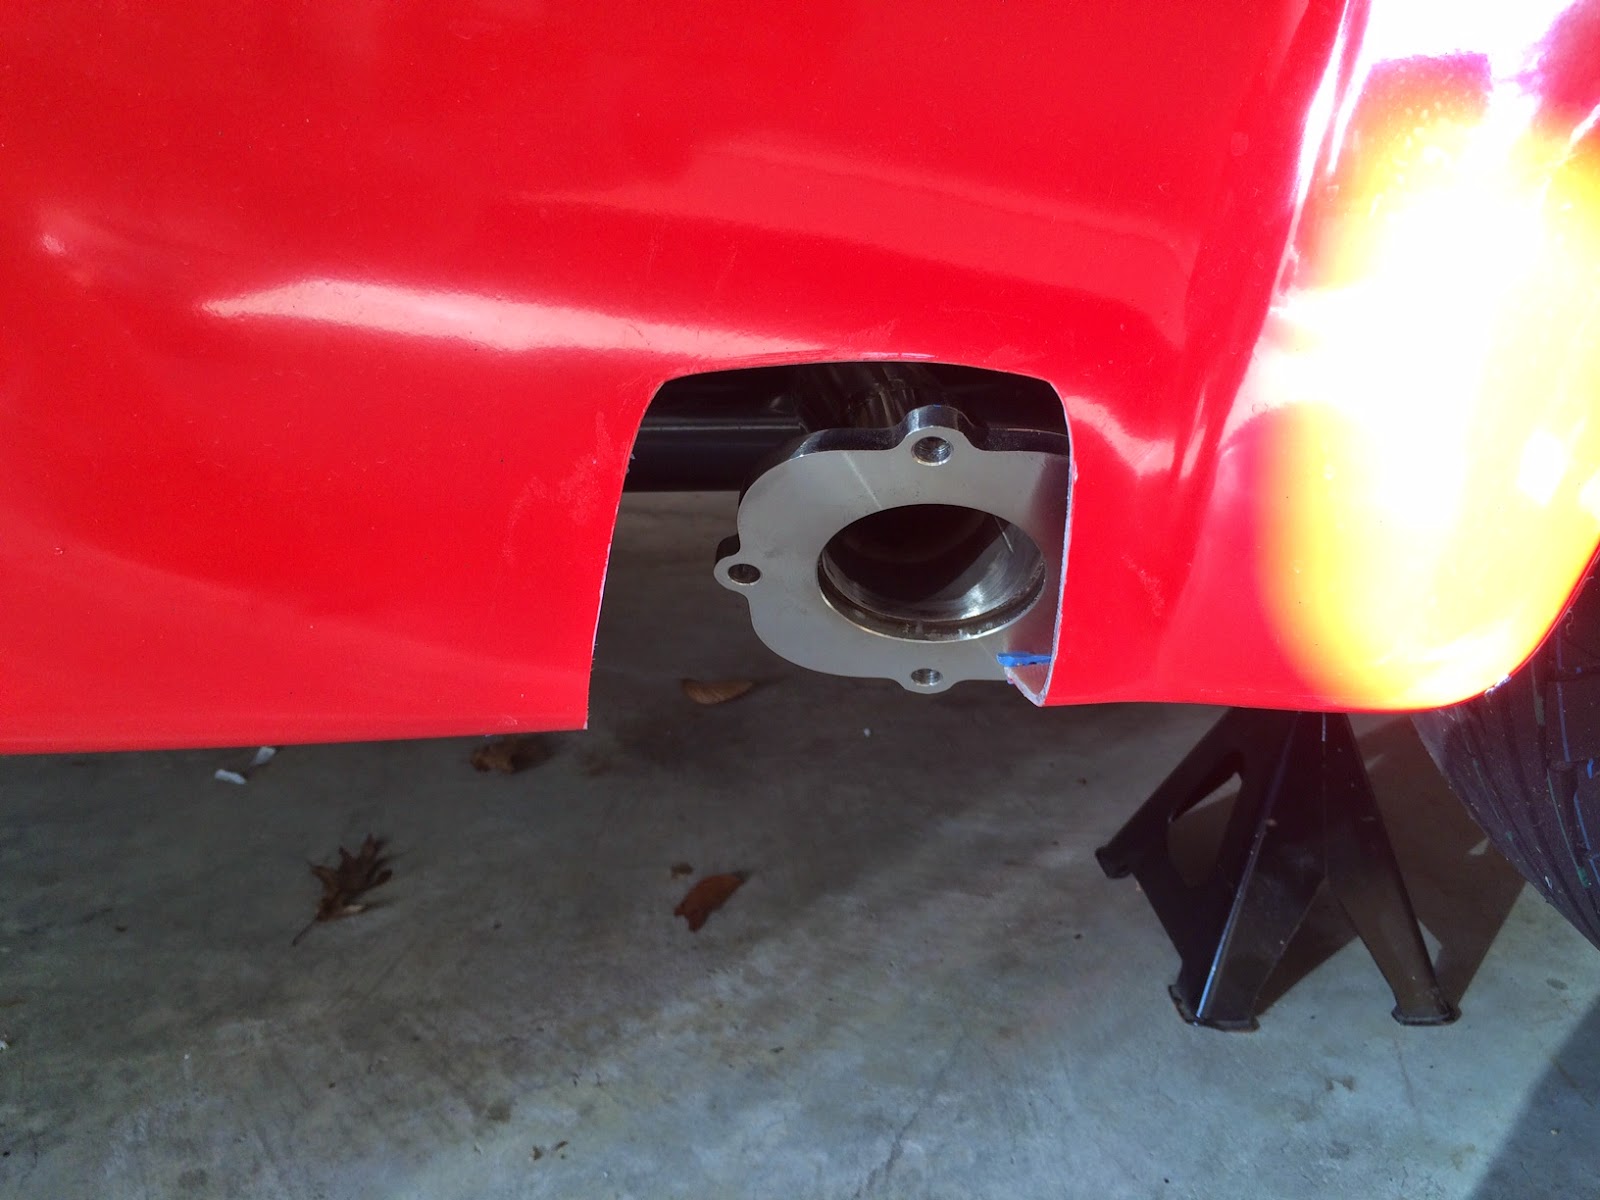

  Here it is after a little fiddling.... An improvement I think.


Monday, January 5, 2015

Fuel Pressure Regulator Plug

January 5, 2015 -

  I had fuel leaking out of the fuel pressure regulator on the front port where the gauge was attached.  It was only a slow drip but fuel in a hot engine bay would be bad.  It took a while figuring out what the right size fitting is but it is 8AN. I bought a 8 AN plug on Amazon for 3$ that was a Jegs product.  I think I might even go back to my original fuel pressure regulator post and update it to state the size since this was so hard to figure out.  I haven't run the engine yet to leak test it though....


Small Lights

January 4, 2015 -

  I put on some of the smaller lights today.  Its not quite as easy as you'd imagine.  Even if you've had the factory cut the holes for them, the bolt holes probably aren't in the right place and you'll need to file them out so that the lights' bolts do fit.  The tail lights, particularly the driver's side, can be a little tough to screw the nut on since you have to reach behind the body in a tighter space between the body and gas tank and you can't see anything. Lastly, the outer ring on one of my turn signals seems to be loose and I'm not sure how to tighten it.


Friday, January 2, 2015

Trunk

January 1, 2015 -

  With some help from Michele I got the trunk put attached.  I'd strongly recommend another hand with the trunk as it makes it much easier having someone just hold the fiberglass while you attach it and also hold it while you have to keep opening and closing it to make adjustments to get it to fit.  I didn't file very much off the edges as I'm going to leave the sanding and bodywork to the body shop when they do the final paint job. I'm just looking for a rough fit.  Here's Michele helping out:


  Michele wanted one of me.  Also, this is the new garage that is well lit and warm!


  The trunk handle is nice once you get that on so you don't have to lift the trunk hood by the hole.  The lock can be a little sticky so be patient.


  I wasn't sure about the latch pin.  It goes through the hole in the fiberglass which you can see below, but then is supposed to go through a hole in the frame but this is blocked by the aluminum panel already in place. I'm dreading the idea of having to drop the gas tank again to get this pin in, so I thought I would stop and ask around about this before continuing.


Thursday, December 18, 2014

Moved!

December 18, 2014 -

  Here's a photo of the roll bar work I got done yesterday.  Today I got the LeMans gas cap on and connected it to the fuel filler connection tube.  That's the big shiny thing on the right rear quadrant of the car and a piece I think is very cool looking.  I remember when I got the shipment, that was one thing I would take out and show people.


  Just in case I got pulled over driving the 5 or 6 blocks to the new garage I bolted up the driver's seat harness.


  It was much colder today than yesterday but still fun to drive!  Here it is right before pulling into the driveway and garage at the new place.


Body

December 17, 2014 -

  This was a big day and I had high hopes.  I put the last of the bulb seal on that needed to go on before the body and put some foam on the sides of the foot boxes.  Here are some past shots before the body went on.  The sun rays were kind of cool and that's the body buck in the background.


  This one from the rear is funny cause my shadow makes it look like Homer Simpson took this photo.


My Dad helped me put the body on.  Thanks Dad!


  What you aren't seeing in these photos is what a giant pain the rear quick jack bolts are to put on.  You need to drop the gas tank in order to put the bolt through.  (And I only found that after fiddling for an hour and then calling Factory Five. [Pro tip: The passenger side tank strap is really hard to get all the way up to where it needs to meet the bolt hole. I used a two by four on its side between the strap and the jack which both lifted the tank and pushed the strap up into position.])  In the afternoon I got the roll bars on with their cool grommets. (Would definitely recommend them as they look great.)  (Photo tomorrow when its lighter.)  Lastly, the car didn't start. Maybe I loosened the fuel pump connection when lowering the gas tank. Will have to figure it out tomorrow.  Guess the car isn't getting moved today.

Tuesday, December 16, 2014

License Plate Wires & Horns

December 15, 2014 -

  From the FFR manual I had the license plate wires laying like this over the passenger side trunk wall.


  I thought it was pretty obvious that the body will pinch those wires (in the black plastic tubing.)  My savior internet friend Dale told me you need to drill a hole in the trunk floor and run them up through a grommet so I did that like so:


  You can see how dark it's getting trying to work at the end of the day in December with no lights.  I also mounted the high and low horns behind the radiator on the driver's side.


  I'll try and get a lighter photo but that is them above the green wires.  I also put the foam and bulb seal on and am pretty much ready for an extra hand to help put the body on and then get it into a lit garage!